
Drawing on the Delphi Canvas|Sample Code for Shapes and Text Rendering with TBitmap and TCanvas (VCL/FMXL)
This article introduces how to draw shapes and text on the Delphi Canvas in both VCL and FMX environments.
It explains essential drawing operations—such as filling areas with TBitmap (FillRect), drawing lines, and rendering text (TextRect / FillText)—with practical sample code.
The article also covers custom drawing in VCL using geometric pens (ExtCreatePen), as well as Canvas operations in FMX when working together with TImage.
Detailed control techniques, including drawing sizes, color settings, and font configuration, are thoroughly explained.
Source Code
For VCL
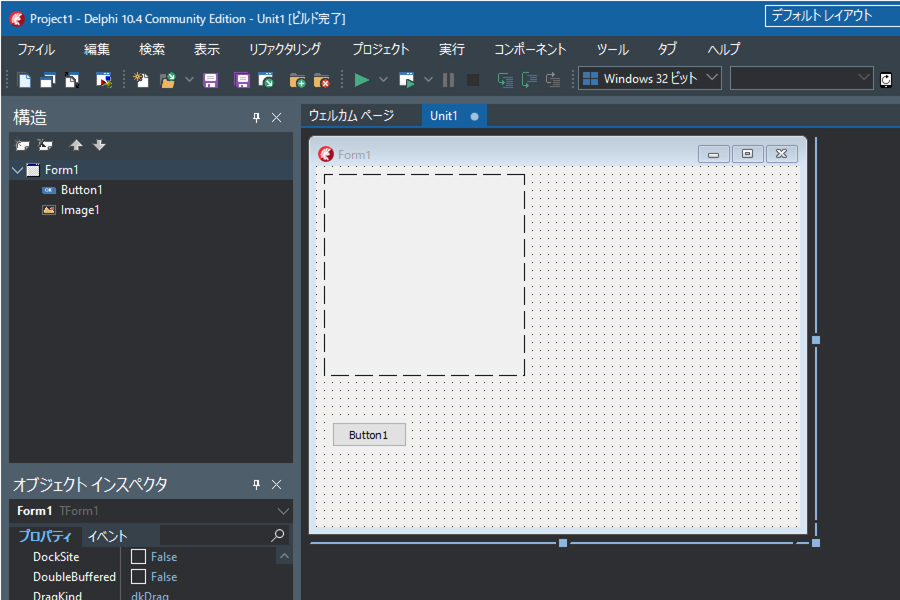
Click "File" -> "New" -> "Windows VCL Application".Drag and drop a TImage and a TButton onto the form.
Double‑click Button1 and enter the following source code:
unit Unit1;

interface

uses
  Winapi.Windows, Winapi.Messages, System.SysUtils,
  System.Variants, System.Classes, Vcl.Graphics,
  Vcl.Controls, Vcl.Forms, Vcl.Dialogs, Vcl.StdCtrls,
  Vcl.ExtCtrls;

type
  TForm1 = class(TForm)
    Image1: TImage;
    Button1: TButton;
    procedure Button1Click(Sender: TObject);
  private
    { Private }
  public
    { Public }
  end;

var
  Form1: TForm1;

implementation

{$R *.dfm}

procedure TForm1.Button1Click(Sender: TObject);
var r:TRect;
    text:String;
begin
// --- Initial settings for Image1 ---
// Set the width and height of Image1
Image1.Width := 200;
Image1.Height := 200;
// Set the width and height of the internal TBitmap held by TImage
Image1.Picture.Bitmap.Width := 100;
Image1.Picture.Bitmap.Height := 100;
// Set the pixel format to RGB (24‑bit color)
Image1.Picture.Bitmap.PixelFormat := TPixelFormat.pf24bit;
// Keep the aspect ratio when displaying the image
Image1.Proportional := True;
// Scale the image to fit the size of TImage
// In other words, display the 100×100 bitmap stretched to 200×200
Image1.Stretch := True;


  // --- Fill (Solid Color) ---
  Image1.Picture.Bitmap.Canvas.Brush.Color := $00ff00; // green
  Image1.Picture.Bitmap.Canvas.Brush.Style := TBrushStyle.bsSolid;
  // Fill the area from (0,0) to (100-1,100-1)
  Image1.Picture.Bitmap.Canvas.FillRect(
    Rect(0, 0, 100, 100)
  );


  // --- Draw a Line ---
  // Set pen properties
  Image1.Picture.Bitmap.Canvas.Pen.Width := 1;
  Image1.Picture.Bitmap.Canvas.Pen.Style := TPenStyle.psSolid;
  Image1.Picture.Bitmap.Canvas.Pen.Color := $ff0000; // blue
  // Draw a line from (0,0) to (100-1,100-1) and move the pen to (100,100)
  Image1.Picture.Bitmap.Canvas.MoveTo(0,0);
  Image1.Picture.Bitmap.Canvas.LineTo(100,100);


  // --- Draw Text ---
  // Set font color and brush style
  Image1.Picture.Bitmap.Canvas.Font.Color := $0000ff; // red
  Image1.Picture.Bitmap.Canvas.Brush.Style := TBrushStyle.bsSolid;
  // Set the font size in pixels
  Image1.Picture.Bitmap.Canvas.Font.Height := 10; // 10 pixels


// --- Bold text and font settings ---
Image1.Picture.Bitmap.Canvas.Font.Style := [TFontStyle.fsBold];
Image1.Picture.Bitmap.Canvas.Font.Name := 'MS PGothic';


// --- Draw text ---
text := 'The text will be wrapped automatically and clipped to the specified rectangle.';
r := Rect(0, 20, 50, 60); // output area
Image1.Picture.Bitmap.Canvas.TextRect(
  r, text,
  [
    TTextFormats.tfLeft, TTextFormats.tfTop, TTextFormats.tfWordBreak
  ]
);


end;

end.
Run
Run the application and click Button1.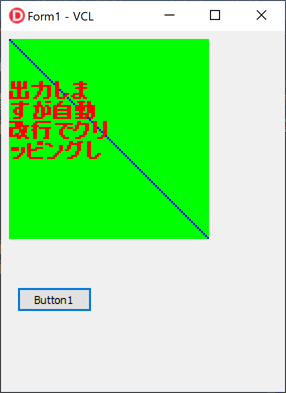
Color Settings
// When Vcl.Graphics is included in the uses clausePanel1.Color := clRed;
// Specify a color in hexadecimal (green)
Panel1.Color := $00FF00;
Fill with a Custom Pattern
procedure TForm1.Button2Click(Sender: TObject);
var
  pattern: TBitmap;
begin
  // --- Initial settings for Image1 ---
  // Set the width and height of Image1
  Image1.Width := 200;
  Image1.Height := 200;
  // Set the width and height of the internal TBitmap held by TImage
  Image1.Picture.Bitmap.Width := 100;
  Image1.Picture.Bitmap.Height := 100;
  // Set the pixel format to RGB (24-bit color)
  Image1.Picture.Bitmap.PixelFormat := TPixelFormat.pf24bit;
  // Keep the aspect ratio when displaying the image
  Image1.Proportional := True;
  // Scale the image to fit the size of TImage
  // In other words, display the 100×100 bitmap stretched to 200×200
  Image1.Stretch := True;
  // Create a TBitmap for the pattern
  pattern := TBitmap.Create;
  try
    // The pattern bitmap must be 8×8 or smaller; larger sizes are ignored
    pattern.Width := 8;
    pattern.Height := 8;
    pattern.Canvas.Brush.Color := RGB($FF, $FF, $FF);
    pattern.Canvas.FillRect(Rect(0, 0, 8, 8));
    pattern.Canvas.Brush.Color := RGB($77, $77, $77);
    pattern.Canvas.FillRect(Rect(0, 0, 4, 4));
    pattern.Canvas.FillRect(Rect(4, 4, 8, 8));
    // --- Fill using the specified pattern bitmap ---
    Image1.Picture.Bitmap.Canvas.Brush.Bitmap := pattern;
    // Fill the area from (0,0) to (100-1,100-1)
    Image1.Picture.Bitmap.Canvas.FillRect(
      Rect(0, 0, 100, 100)
    );
    Image1.Picture.Bitmap.Canvas.Brush.Bitmap := nil;
  finally
    pattern.Free;
  end;
end;
Using a Geometric Pen Instead of the Default Cosmetic Pen
procedure TForm1.Button3Click(Sender: TObject);
var
  LogBrush: TLogBrush;
  PenStyle: Cardinal;
  pen: HPEN;
  OldPen: HPEN;
  ArrPoint: Array[0..2] of TPoint;
begin
  // --- Initial settings for Image1 ---
  // Set the width and height of Image1
  Image1.Width := 200;
  Image1.Height := 200;
  // Set the width and height of the internal TBitmap held by TImage
  Image1.Picture.Bitmap.Width := 100;
  Image1.Picture.Bitmap.Height := 100;
  // Set the pixel format to RGB (24-bit color)
  Image1.Picture.Bitmap.PixelFormat := TPixelFormat.pf24bit;
  // Keep the aspect ratio when displaying the image
  Image1.Proportional := True;
  // Scale the image to fit the size of TImage
  // In other words, display the 100×100 bitmap stretched to 200×200
  Image1.Stretch := True;

  // Save the existing cosmetic pen
  OldPen := Image1.Picture.Bitmap.Canvas.Pen.Handle;
  // Create a geometric pen
  LogBrush.lbStyle := BS_SOLID;
  LogBrush.lbColor := RGB($0, $cc, $cc);
  LogBrush.lbHatch := 0;
  PenStyle := PS_GEOMETRIC + PS_DASH + PS_ENDCAP_ROUND + PS_JOIN_ROUND;
  pen := ExtCreatePen(PenStyle, 3, LogBrush, 0, nil);
  // Apply the created geometric pen
  Image1.Picture.Bitmap.Canvas.Pen.Handle := pen;
  // Draw a polygon
  ArrPoint[0].X := 0;
  ArrPoint[0].Y := 0;
  ArrPoint[1].X := 99;
  ArrPoint[1].Y := 30;
  ArrPoint[2].X := 40;
  ArrPoint[2].Y := 96;
  Image1.Picture.Bitmap.Canvas.Polygon(ArrPoint);

  // Restore the original cosmetic pen
  Image1.Picture.Bitmap.Canvas.Pen.Handle := OldPen;

  // Delete the created geometric pen
  DeleteObject(pen);
end;
For FMX
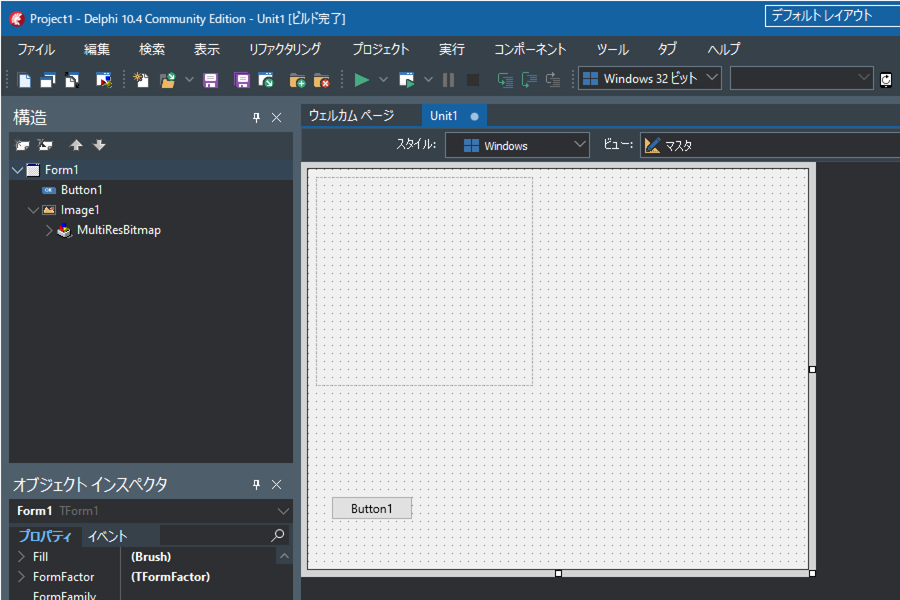
Click "File" -> "New" -> "Multi-Device Application".Select "Blank Application".
Drag and drop a TImage and a TButton onto the form.
Double‑click Button1 and enter the following source code.
unit Unit1;

interface

uses
  System.SysUtils, System.Types, System.UITypes,
  System.Classes, System.Variants,FMX.Types, FMX.Controls,
  FMX.Forms, FMX.Graphics, FMX.Controls.Presentation,
  FMX.StdCtrls, FMX.Objects;

type
  TForm1 = class(TForm)
    Image1: TImage;
    Button1: TButton;
    procedure Button1Click(Sender: TObject);
  private
    { private }
  public
    { public }
  end;

var
  Form1: TForm1;

implementation

{$R *.fmx}

procedure TForm1.Button1Click(Sender: TObject);
begin
  // --- Initial settings for Image1 ---
  // Set the width and height of Image1
  Image1.Width := 200;
  Image1.Height := 200;
  // Set the width and height of the internal TBitmap held by TImage
  Image1.Bitmap.Width := 100;
  Image1.Bitmap.Height := 100;
  // FMX cannot use BGR (24-bit); it appears to be fixed to BGRA
  //   Not allowed: Image1.Bitmap.PixelFormat := TPixelFormat.BGR;
  // Keep the aspect ratio when displaying the image
  // Scale the bitmap to fit the size of TImage
  // In other words, display the 100×100 bitmap stretched to 200×200
  Image1.WrapMode := TImageWrapMode.Fit;


  //Call before drawing
  Image1.Bitmap.Canvas.BeginScene();


  // --- Fill (Solid Color) ---
  Image1.Bitmap.Canvas.Fill.Color := $ff00ff00; // green
  Image1.Bitmap.Canvas.Fill.Kind := TBrushKind.Solid;
  // Fill the area from (0,0) to (99,99)
  Image1.Bitmap.Canvas.FillRect(
    RectF(0, 0, 99, 99), 0, 0, [], 1
  );


  // --- Draw a Line ---
  // Set stroke (pen) properties
  Image1.Bitmap.Canvas.Stroke.Thickness := 1;
  Image1.Bitmap.Canvas.Stroke.Dash := TStrokeDash.Solid;
  Image1.Bitmap.Canvas.Stroke.Color := $ff0000ff; // blue
  // Draw a line from (0,0) to (99,99)
  Image1.Bitmap.Canvas.DrawLine(PointF(0,0), PointF(99,99), 1);


  // --- Draw Text ---
  // Set color and style
  Image1.Bitmap.Canvas.Fill.Color := $ffff0000; // red
  Image1.Bitmap.Canvas.Fill.Kind := TBrushKind.Solid;

  // Set font size in pixels
  {$IFDEF MSWINDOWS}  // On Windows, divide by 72 and multiply by 96
    Image1.Bitmap.Canvas.Font.Size :=
      Image1.Bitmap.Canvas.Font.Size /
      Image1.Bitmap.Canvas.TextHeight('M') / 72 * 96 * 10; // 10 pixels
  {$ELSE}
    Image1.Bitmap.Canvas.Font.Size :=
      Image1.Bitmap.Canvas.Font.Size /
      Image1.Bitmap.Canvas.TextHeight('M') * 10; // 10 pixels
  {$ENDIF}

  // --- Bold text and font settings ---
  Image1.Bitmap.Canvas.Font.Style := [TFontStyle.fsBold];
  // Font family
  Image1.Bitmap.Canvas.Font.Family := 'MS PGothic';

  // Draw text (automatically wrapped and clipped to the rectangle)
  Image1.Bitmap.Canvas.FillText(
    RectF(0, 20, 50, 60),
    'The text will be wrapped automatically and clipped to the specified rectangle.',
    true, 1, [],
    TTextAlign.Leading, TTextAlign.Leading
  );


  //Finish drawing
  Image1.Bitmap.canvas.EndScene();
end;

end.
Run
Run the application and click Button1.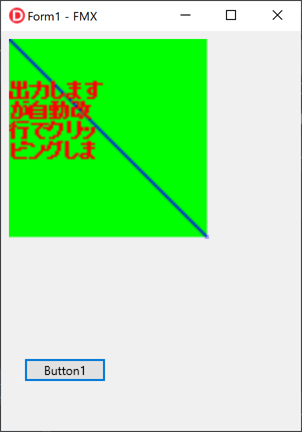
Color Settings
// If System.UITypes is included in the uses clauseRectangle1.Fill.Color := TAlphaColorRec.Red;
// If System.UITypes is included in the uses clause
Rectangle1.Fill.Color := claBlue;
// Specify a color in hexadecimal (green)
Rectangle1.Fill.Color := $FF00FF00;